Changing the Camera Settings
The camera always looks at what is called the Fix Point. This is a point in the 3D window which starts out being at (0.0, 0.0) the starting position of the robot. To change the camera with the mouse, first make sure that the Track and Dolly check boxes in the toolbar are unchecked and then perform the following with the mouse pointer over the 3D window.
- To rotate about the current fix point, hold the left button down and drag the mouse until the desired orientation is achieved.
- To zoom in and out of the fix point, hold the middle mouse button down while dragging the mouse up or down.
- To move the fix point of the camera (what the camera is looking at), hold down the right button while dragging the mouse. This will rotate the 3D view about the camera position instead of the fix point, effectively changing the fix point.
- To set the fix point to be at the location of something in the graphical screen, hold down Shift and then click on the location on the screen.
Play with moving the camera via the mouse until you are comfortable with it.
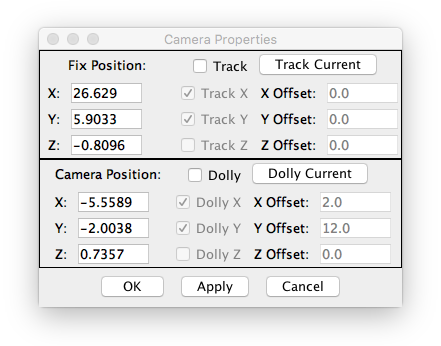
You can also change the camera parameters by using the dialog accessed through Viewport->Camera Properties… from the menu bar.

- If tracking is enabled, then the camera will track the location specified by the simulation variables q_x, q_y, q_z.
- If dolly is enabled, then the camera will move at an offset from the location specified by the simulation variables q_x, q_y, q_z.
- The variables used for tracking or dolly can also be set using the SimulationConstructionSet API.
