Create The ValkyrieDemo Class
Once GradleProject has been imported into IntelliJ IDEA, the project window should open.
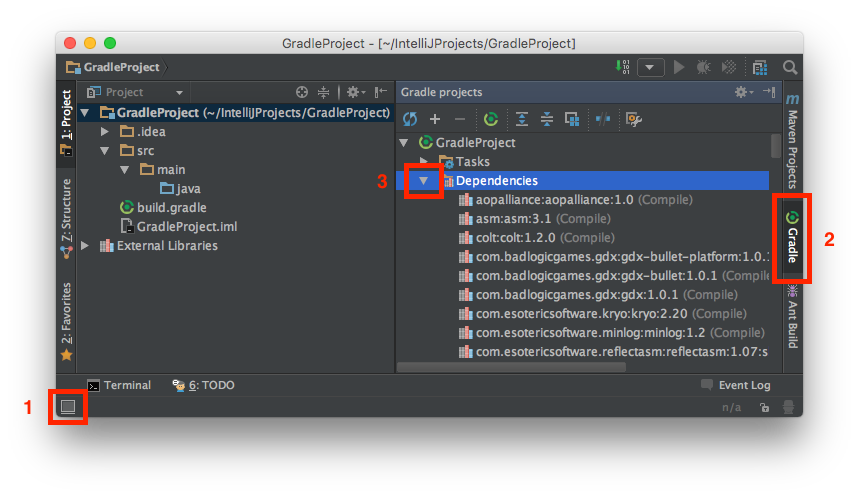
Open the "Gradle projects" Tool Window
1. Hide/Show Tools tabs
In the lower left corner of the project window you will see the Hide/Show tools icon. If you do not see the Gradle tab on the right select this icon to show it.
2. Open the "Gradle projects" Tool Window
On the right of the project window you should see a Gradle tab, select it to expand the "Gradle projects" tool window.
3. List Gradle Dependencies
Select the triangle next to Dependencies in the "Gradle projects" tool window. You should now see a full list of dependencies. These libraries have been automatically downloaded from the remote repositories specified in your build.gradle script and linked to your project.
You can hide/show the "Gradle projects" tool window by selecting the Gradle tab on the right.
Create a New Class to Run the Valkyrie Simulation
Java classes are organized by "packages". Many IHMC packages start with us.ihmc, you can use your organization, a personal website, or whatever you'd like as your package. Here we're going to use us.ihmc.demo as the package, and ValkyrieDemo as the name of the class.
In the project tool window on the right, right click on the java folder, and select Java Class under the New menu.
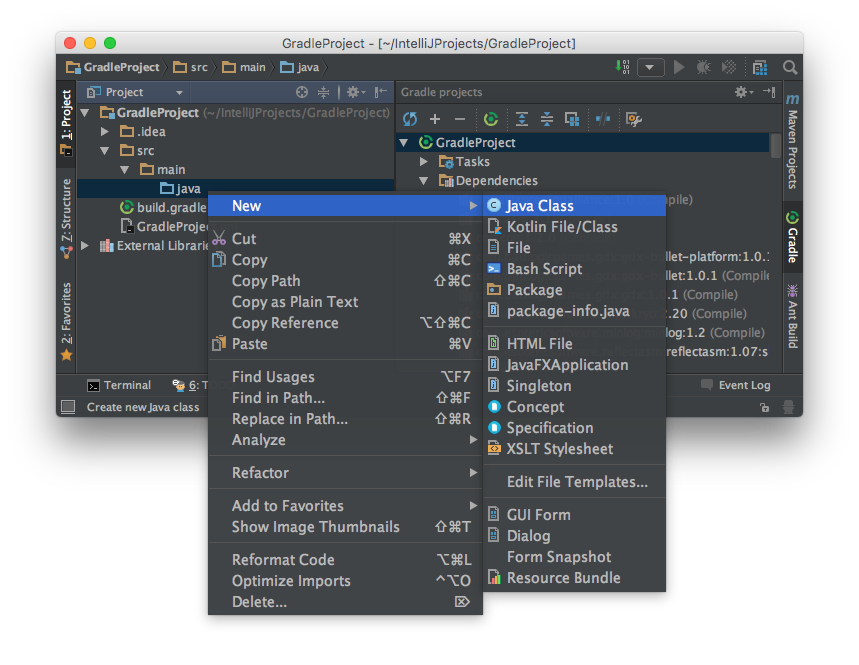
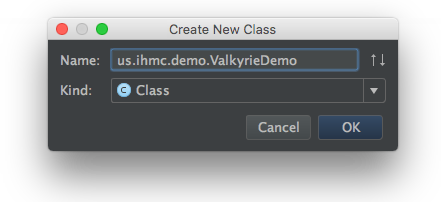
Enter us.ihmc.demo.ValkyrieDemo for the Name field and select OK.
ValkyrieDemo Class
You should now see a skeleton of your ValkyrieDemo class. Replace the skeleton text with the following java source code: